
It's the Simple Things
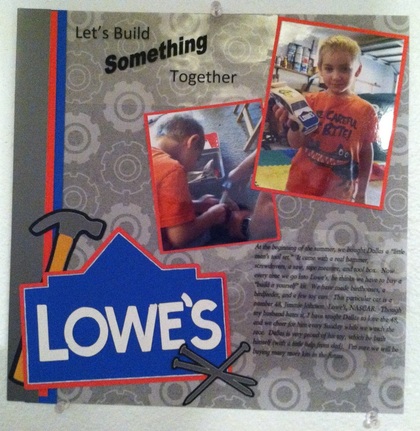 We bought my son, Dallas, a "Little man's tool kit" at Lowes a few months back, and ever since we have built all kids of things. I think everyone on our street now has a Dallas made birdhouse or birdfeeder, LOL. At least he is learning a skill and having a good time doing it.
I am super pround of myself with this page. I set out to re-create the Lowe's logo, and I think I did a pretty good job. It took me a little time and the cricut craft room, but I got it done. I used craft room basics to make the Lowes sign by layering basic shapes until I had the outline. I used the cricut cartridge: Handman to cut out the hammer and nails. I really don't like my handwritting, so I printed the title and the journaling block using my laptop. The best part is that other than the background paper, everything else was made using paper from my scrap stash, including the transparent paper. Materials Used: Cricut: Handyman (hammer and nails) and Craft Room Basics (Lowe's Logo) Paper: The Paper Studio: Little Boys and Their Toys paper pack Font for text: Berylium
3 Comments
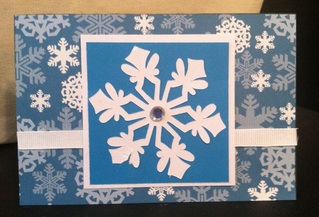
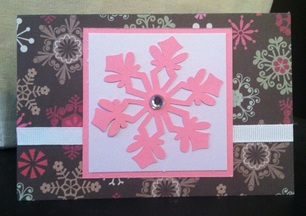
So, I live in Texas, a place where it doesn't snow very often, not at christmas time anyway. If it does snow, it's usally for valentines day. With that, I still love snowflakes and wanted to use them in my last christmas card set for this year. I used the winter lace cricut cartridge to cut the snowflake out. This card is very simple, pattern paper for the background, a double matted square for the snowflake, and finished it off with some ribbon and a rhinestone center. I couldn't decide which snowflake backgound paper I liked the most, so I make the same card using the two different colors, the problem is....I still can't decide which one I like the most...
Materials Used: Cricut: Winter Lace Paper: The Paper Studio - All Seasons II stack Ribbon: White Grosgrain Entered in challenge #139 at the Fantabulous Cricut Challenge Blog - Make a holiday card My son's daycare teacher, Miss Pam, has been a bit under the weather lately, so I wanted to make a card to tell her how much we love her and everything she does for Dallas. Today is the last day of daycare before the Thanksgiving holiday, so we will give it to her today :) 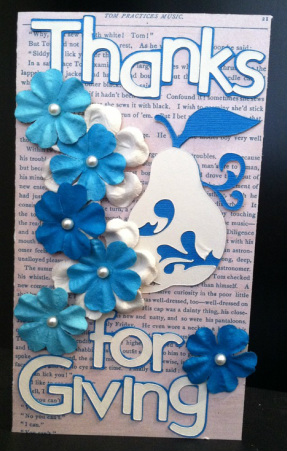
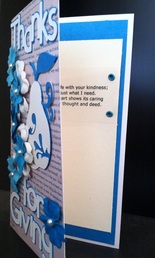 I started by cutting the card base out. I cut the card at 6 x 8, which makes a 4 x 6 card when it is folded in half. The next thing I did was cut all the peices out, using my cricut. I cut the pear out using the cricut cartridge, Wall Decor and More, and cut the Thanks for Giving title out using my Sans Serif cricut cartridge. I cut the the pear image out twice, once in cream and the second time in blue, then cut the layer image once in blue. I did this so I could use the swirl, stem, and leave from the blue image to layer on top of the cream. I wanted the final image to more color, and I think this worked out pretty well. I cut the title out in cream. For the title shadow, I used the weld feature in cricut craft room to attach each letter, and cut it out in blue.
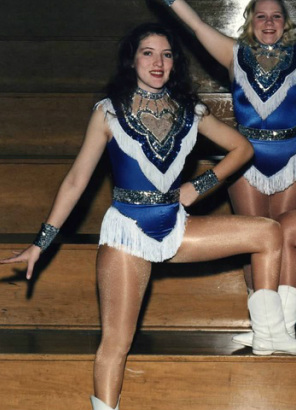
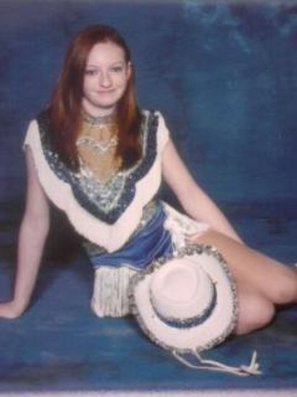
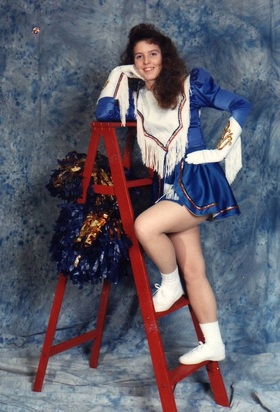
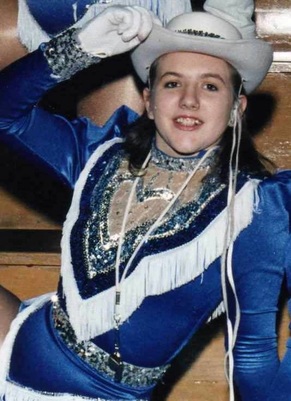
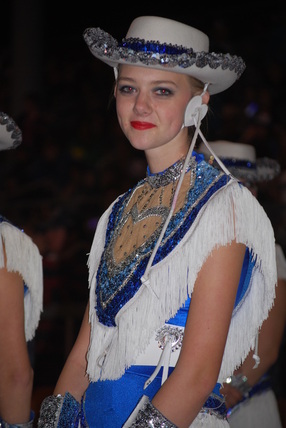
Next, I put everything together, attaching the title and pear. It still needed something, so I went searching in my supplies box, and found these great blue and cream color paper flowers. I think they added the perfect final touch. I hope Miss Pam loves the card as much as I do!!! Materials Used: Cricut: Wall Decor and More and Sans Serif Paper: DCWV - A Type of Art paper stack Flowers: paper flowers from Michaels I love my Quinlan-Ford High School Blue Belles. Not only because I was a member of this team in high school, but because it taught me how to be a responsible, mature adult. Many of the lessons I learned in drill team, like how to be on time, how to complete a project, and the value of hard work, have made me a better person. The Belles hold a special place in my heart, I and many of my family members have danced on this team, it's something that we are proud of. 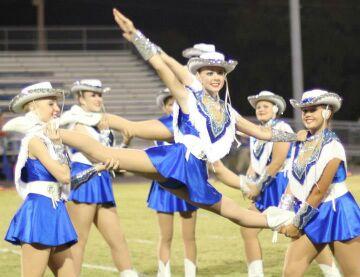
Our current Belle, Alexis. She is a sophmore and is in her first year as a Belle. (She is the one doing the split in the stunt)
The Blue Belles were formed in the 1968 - 1969 school year. I have devoted a bit of time, researching and recording the history of this team. You can read more about the Belles on their website. My first family member to be a part of this team was back in the 70's. Little did she know, but she was the first of many young ladies to follow. I have posted a timeline of sorts of all the family members who proudly call themselves Blue Belles. The uniform has changed a bit over the years, but the honor is the same.....Once A Belle, Always A Belle!!!
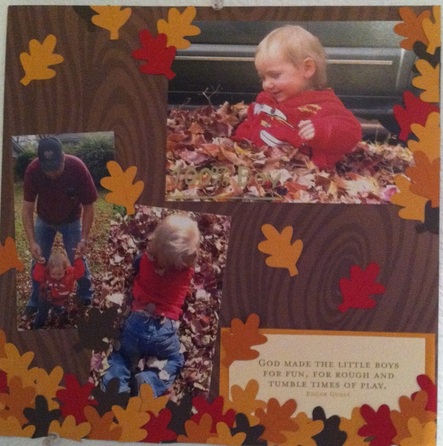 These pictures take me back....oh, about 4 years. I took these in 2008, when my son, Dallas, was only a year old. He loved to kick the piles of leaves in the yard, so one day I gave in and let him roll around in them. He couldn't even walk yet, but had the best time.  I am entering my scrapbook page in the Cricut Fanatics Cricut Crafty Challenge #3. The goal, was to create a project, using the picture as inspiration, using the color orange, and at least one cricut cut. For my scrapbook page, I cut out, what seemed like a thousand fall leaves, using the Cricut cartridge, Doodlecharms. The background paper is from Colorbok's Earthtones paper pack, and quote is a rub-on (sorry I don't know who the maker is, I haven't always been as good as keeping up with product makers). I used 4 differnt colors for the fall leaves: red, orange, yellow, and a brown. I love the tree background paper and the leaves falling from the top of the page, it screams fall to me! Materials Used: Cricut: Doodlecharms Paper: Colorbok - Earthtones paper pack Blog post update: Decembe 5, 2012 I am excited to say that I was choosen as the Cricut Crafty Challenge winner on Cricut FANatics for my fall scrapbook page. Go visit them, view my page on their blog, and enter their next challenge at: http://www.cricutfanatics.blogspot.com/2012/12/cricut-crafty-challenge-3-winner.html  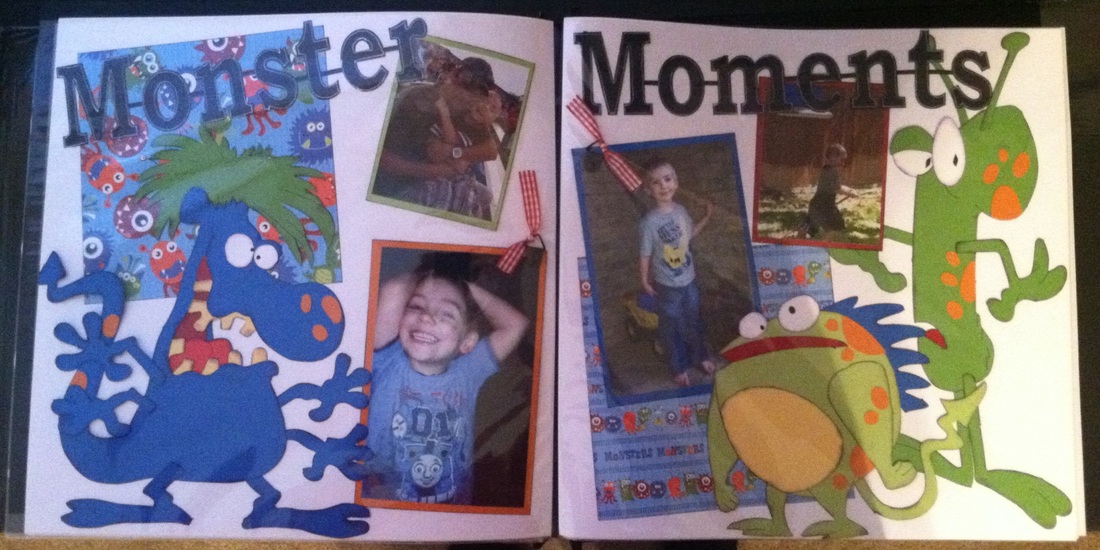
Just a quick post to share a scrapbook page. This is a scrapbook kit that I bought at last year's Great American Scrapbook Convention, and am just now using it. It is from Lickety Split Scrapbooks and was a lot of fun to put together. The kit came with everything you need, the paper, tabs, ribbon, and the paper peices for each of the three monsters. The only thing I did different from the instructions, is outline the title using a silver gel pen. I felt that they needed something to help them "pop" off the page a bit. Sorry you can't see that little detail very well in the picture, I took the picture with my iphone and didn't do a very good job.
I like that I was able to use some random, left over pictures from this year to highlight some fun "monster moments" of my son, Dallas. You know, like him putting his pants on backwards or chasing his brother and sister around the back yard with the water hose, LOL, never a dull moment. Materials Used: Scrapbook Kit: Monster Moments by Lickety Split Scrapbooks Ink: Basic Black from Stampin Up |
 
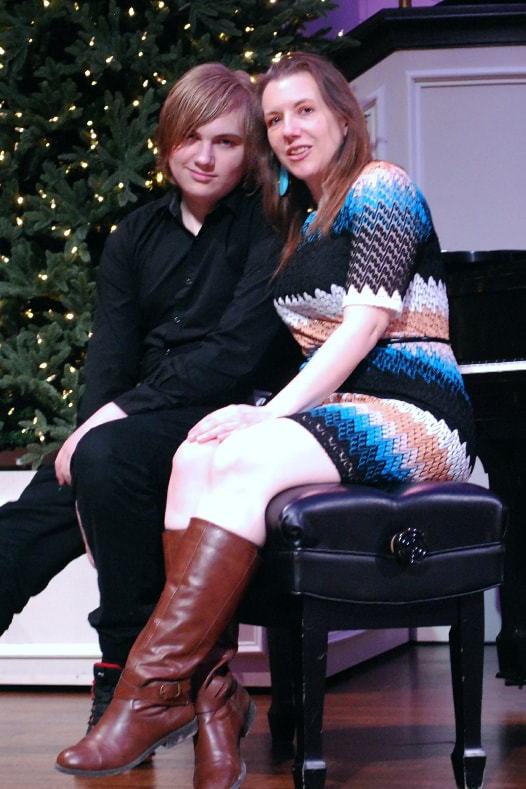
JoNeita & Dallas - Dec. 2021
About MeMy name is JoNeita Kelly and I have been crafting for at least the last 20 years. I live in Forney, Texas with my son, Dallas. I am a High School teacher and Cheerleading Coach. I love to craft and to continue to improve my photography and editing skills whenever I have free time. What I love most is telling our story using pictures, it is the most important gift I can leave my family. 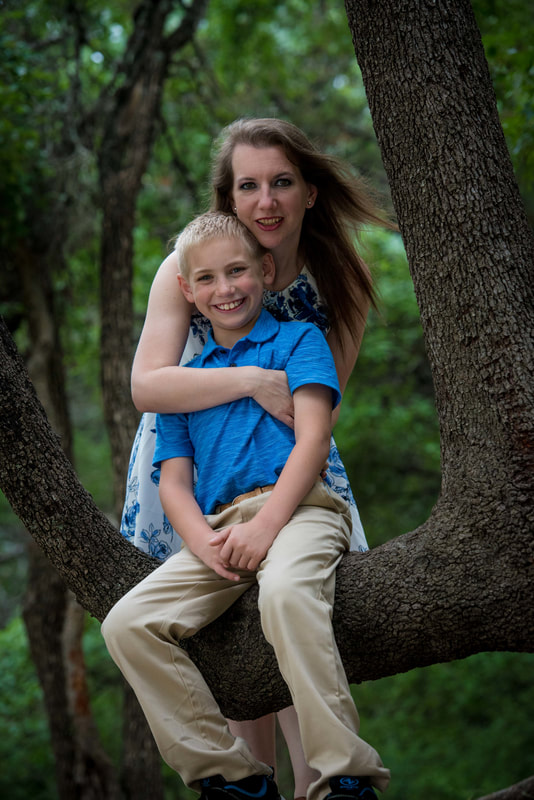
Photo by Steven Mackie Photography.
Categories
All
Archives
December 2021


Former Design Team Member for Fantabulous Cricut Challenge Blog
 |


 RSS Feed
