
It's the Simple Things
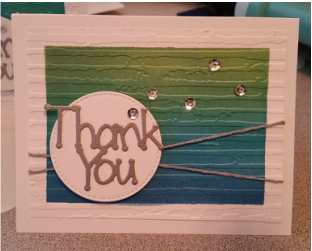
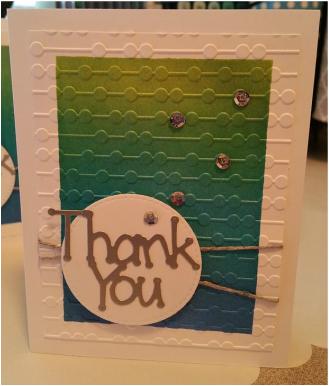
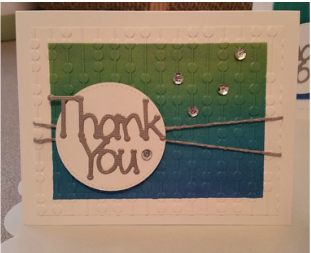
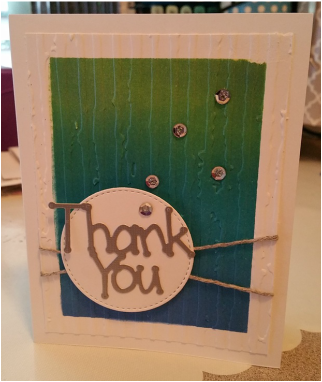
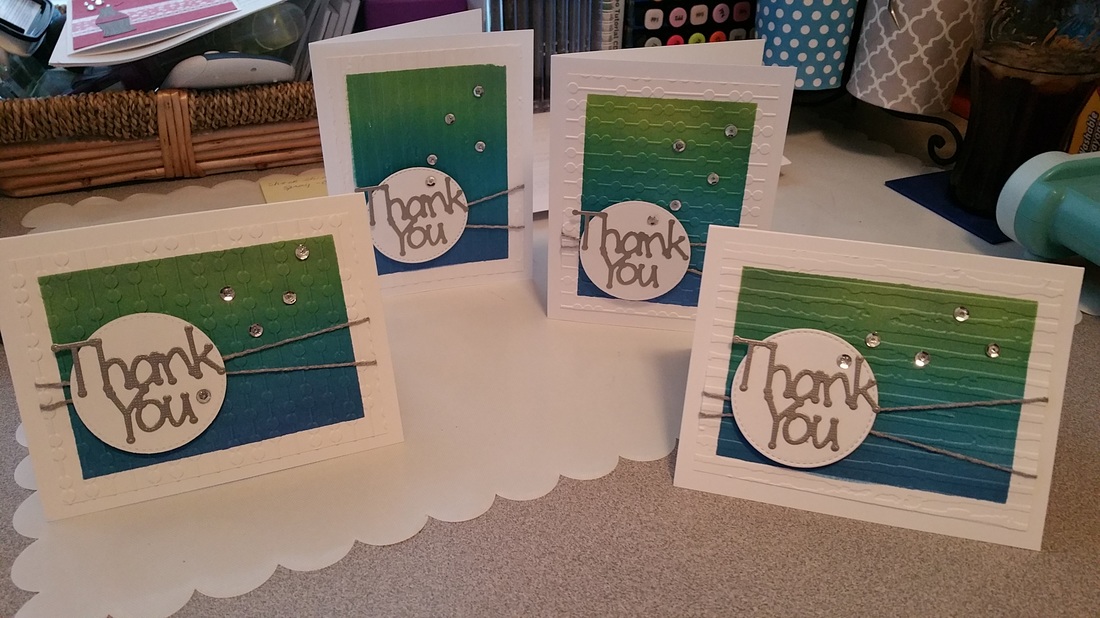 I am always looking for new ways to use the products that I already own, so I watch a lot of videos and visit a lot of blogs to soak in as many new techniques and new ideas as possible. Every once in a while, I come across something that just wows me, and this technique did. I love it!!! As soon as I was finished watching the video, I pulled out my supplies and made these Thank You cards. My mind is full of other ways to use this technique and the supplies, that I already have, that I can use to make them. I believe in giving credit to those I learn from. I found this video: Faux Textured Metal Paper on the Jennifer McGuire Ink blog (the link will take you to this specific video). She has some great stuff, so check it out. The general steps to make these cards are:
Materials Used:
Ink: Tim Holtz Distress Inks in Twisted Citron, Mermaid Lagoon, and Blueprint Sketch Perfect Pearls: Forever Blue Stamps of Life: "Thank You" die, silver twine, silver sequins My Favorite Things: Stitched Stackable Circles Cardstock: Recollections Challenges Entered: Pause Dream Enjoy Glitter 'N' Sparkle Cupcake Inspirations Come and Get It Lil' Patch of Crafty Friends Pile it On Crafting by Designs If You Give a Crafter a Cookie Simon Says
12 Comments
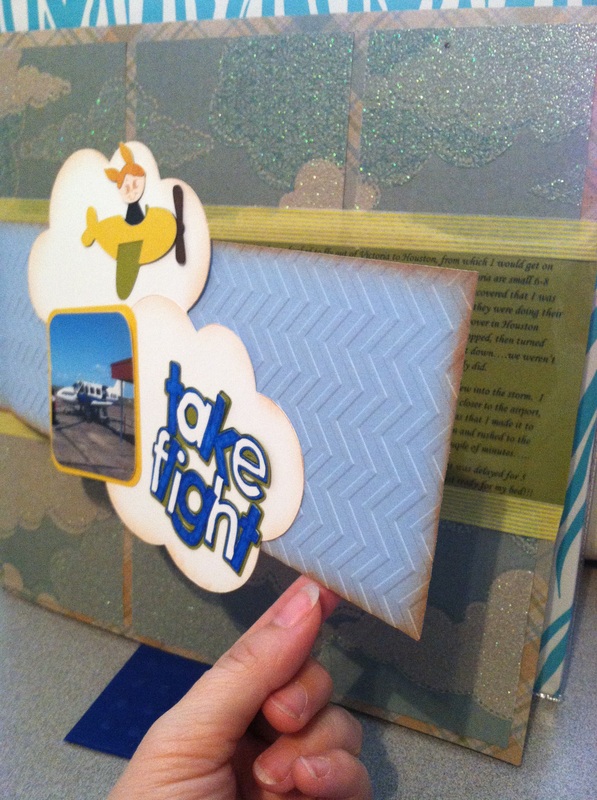
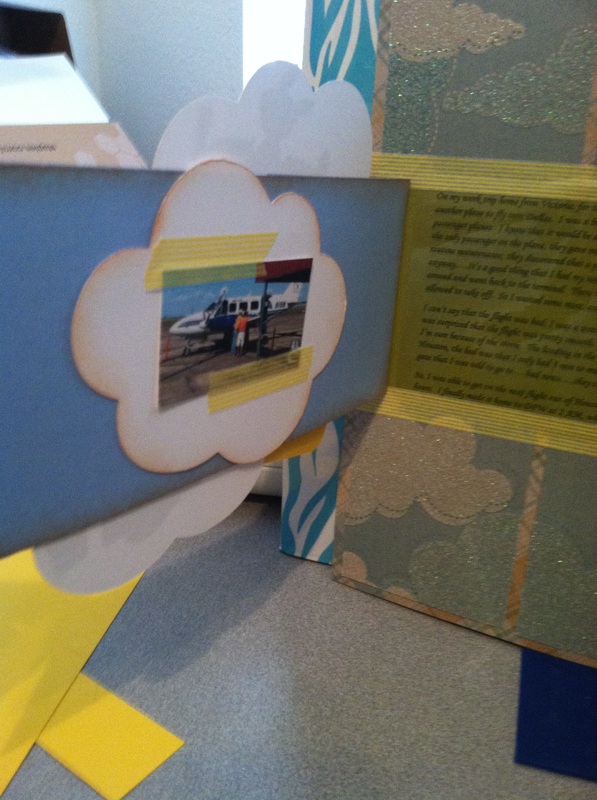
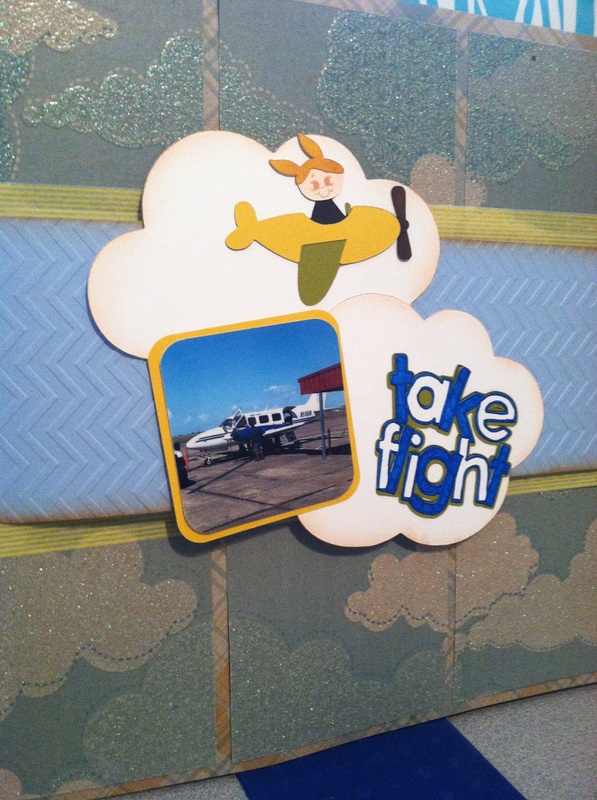
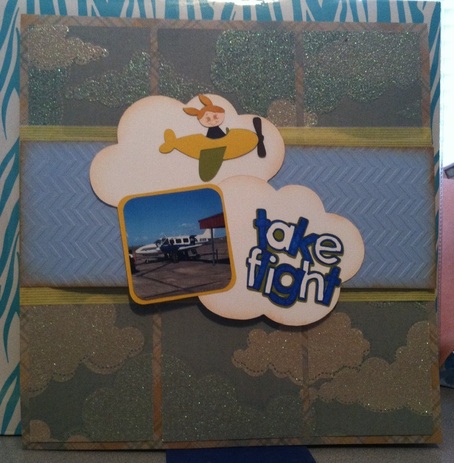 What do you do when you have a great story to tell, one that you want to preserve in a scrapbook, but don't really have any pictures to go along with it? I choose to create a scrapbook layout that will focus on the story, and use decorative items to create a beautiful page. That is what happened with this page. It is about my journey from Victoria to Houston to Dallas, which was quite a trip. Let's just say it involves a 8 passenger plane, a storm over Houston, and a lot of waiting around in airports. I only had two small pictures, and they weren't very good pictures at that. So, I did a lot of journaling, which you can't see in this picture, but you can see where I hid it below in the next set of images.
Materials Used: Cricut: Beep Beep, Craft Room Basics, & Simply Charmed Paper: DCWV - The Playtime Stack Ink: Tim Holtz Tea Die Distress Ink Stamp: Peachy Keen Face Stamps Cuttlebug: Darice Chevron Embossing Folder Other: Spectrum Noir - EB5, TB6, & FS6; Blue gelly roll pen, Recollections yellow strip washi tape, & transparent sheet with journaling on computer. Challenges Entered: Die Cuttin Divas Paper Playtime Frosted Designs Scrappy Mom Stamps My Craft Spot Cuttlebug Mania  Blog Update: December 11, 2013
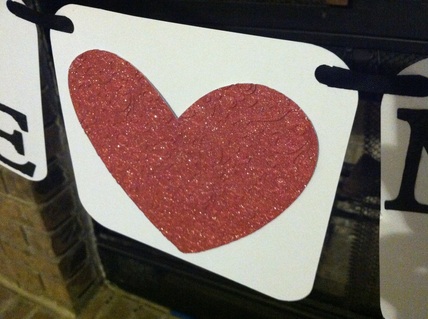
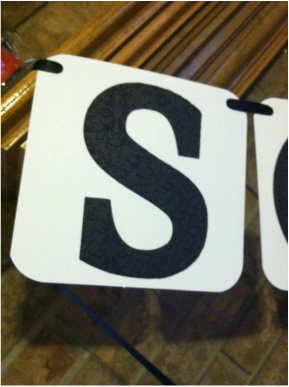
My Take Flight Layout was showcased on the Die Cuttin' Divas challenge site. This was a sketch challenge, that I don't normally participate in, but this one really inspired me :) 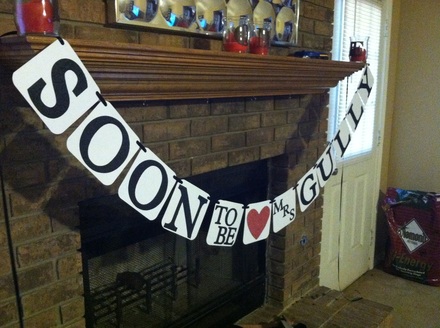 A good friend of mine asked me to make a banner for a bridal shower that she was helping to plan. She wanted a banner that said "Soon To Be Mrs. Gulley," clean, simple, and elegant. I cut the banner in white cardstock, using Craft Room Basics. I used a rounded corner square, then added a small circle in each corner, so that they would all match. There is nothing worse than trying to line up the holes using a hole punch. Next I cut the letters and the heart (in pink sparkle paper) using Plantin Schoolbook, and embossed them using a Damask Darice embossing folder. Then it was as easy as attaching everything together and stringing it all using a black satin ribbon. Come to find out, I forgot the E in Gulley, so I had to come back and make another, but that was easy enough since I had saved the file in Craft Room.
Materials Used:
Cricut: Plantin Schoolbook & Craft Room Basics Cuttlebug: Damask Darice Embossing Folder Paper: DCWV the glitter cardstock stack & Recollections cardstock Ribbon: Black Satin Ribbon (don't remember where I bought it, but it was prob. Jo Ann's or Michaels) Challenges Entered: Hiding In My Craft Room Paper Playtime Frosted Designs My Craft Spot 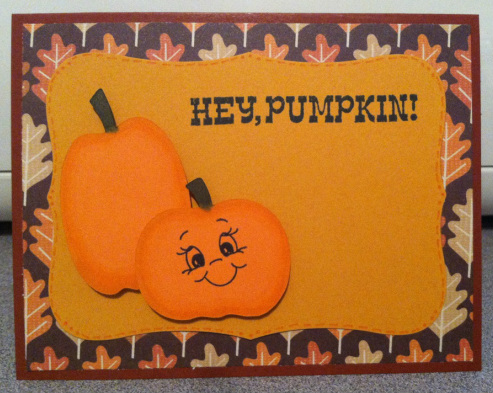 It's challenge time over at Fantabulous Cricut. This week's challenge is Signs of Fall. Using at least one Cricut cut, create a project with a Fall theme (pumpkins, leaves, harvest, etc.) I had so much fun making this super cute card. I had bought a couple of new products that I wanted to use, and had a great time testing them out. I cut out the 3 pumpkins, using Create A Critter. I stretched one to make it taller and not as wide. You can't see the 3rd pumpkin, I put it on the inside of the card in the bottom right corner. I bought the 12 sets of the Spectrum Noir alcohol ink markers. I know that they are to color in digi and stamped images, but I wondered if I could use them to add some edges to my Cricut cuts, like I usually would do with chalk. I used DG3 to color the pumpkin stems, and used GB5 and OR1, and the Blender pen to edge the pumpkins. I love out it turned out and using the blender pen on the very inside really helped the natural color of the cardstock blend with the marker color.
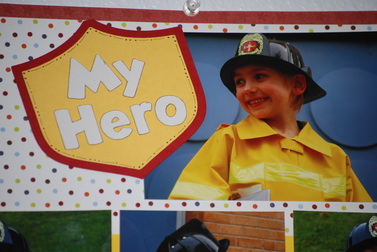
I had also bought the Labels Eight dies by Spellbinders because they were 40% off (I love a good deal). I used them to cut out the scallop base for the pumpkins. I edged it using a orange gelly roll pen. One more new product that I am so in love with is the Peachy Keen face stamp set. OMG....They are so cute and I love that you can put a little face on anything. I think it really makes this card super cute. Don't forget to link up your "Signs of Fall " Project over at the Fantabulous Cricut Challenge Blog!!! Materials Used: Cricut: Create A Critter Stamps: "Hey Pumpkin" by Recollections, "Smiley Face" by Peachy Keen Stamps Ink: Memento Tuxedo Black Ink Paper: The Paper Studio - All Seasons II and Recollections Cardstock Spectrum Noir: DG3, GB5, OR1, and Blender Pen Cuttlebug: Spellbinders - Labels Eight Other: Orange Gelly Roll pen, foam tape Challenges: Bitten by the Bug 2 Mark's Finest Papers Cut it Up Scrappy Moms Stamps Craftin Desert Divas 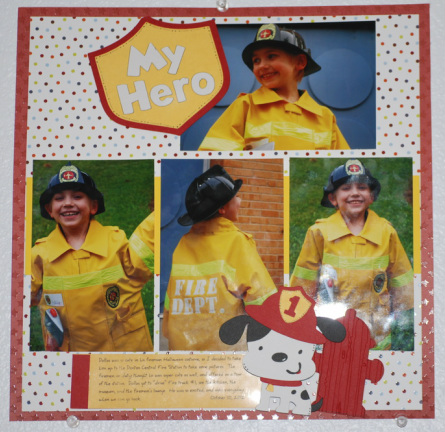 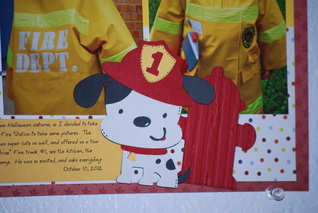 I got around to doing a layout to highlight the pictures I took of my son in his Halloween outfit, for Halloween 2012. He was so cute in his fireman jacket, so I knew I wanted to create a theme page to really highlight the pictures. I think I use my Create A Critter cartridge more than I have any other, but I couldn't resist the little fire dog and accessories. The title, was cut using Create A Critter as well, but cut the letters using the Disney Mickey Font cartridge. I used my Cuttlebug to add texture. I really like how this page turned out, one of my favs of the year. This was also his birthday theme, which in is October as well.
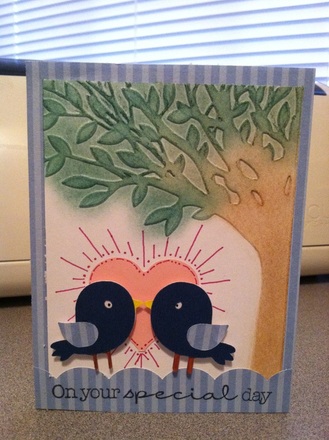 I bought this great (really I bought a bunch of great) embossing folders that I found on sale for $1.97 each!!!! This one was the one that I wanted to use the most, so I decided that the best thing to go along with a tree would be some little birds. I embossed the tree, and colored it using my decorating chalks and pastel chalk pencils. Then I cut out the birds using my Create A Critter cartridge. The scallop on the bottom is a leftover cut from Pretty Pendants, which I stamped "On your special day." I thought this would make a super cute card for a wedding, engagement, or anniversary. I punched the heart using an old punch that I had, sorry I don't remember. I really like how it turned out and I love how the chalk colors all blend together so well. Materials Used: Cricut: Create A Critter and Pretty Pendants Paper: Recollections cardstock and scraps from my stash Stamp: Stampabilities - Card Phrases 2012 Ink: Memento Tuxedo Black Cuttlebug: Leafy Tree by Darice Pens: Zig-pure yellow, brown and pink gelly roll Chalks: Decorating Chalks by Craft-t Products & Pastel Chalk Pencils by Generals Other: Heart Punch Challenges Entered: Bitten by the bug 2 Cardz TV Hiding in the Craft Room Marks TV Paper Girls Craftin Desert Divas Little Scrap Pieces
|
 
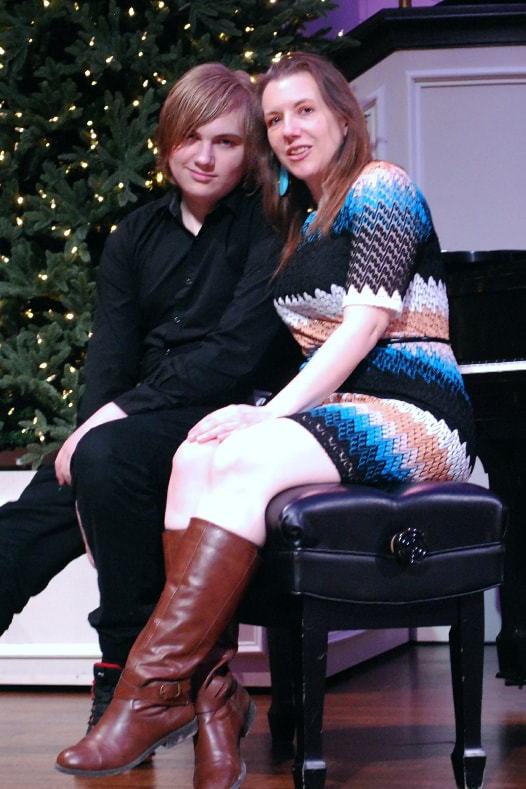
JoNeita & Dallas - Dec. 2021
About MeMy name is JoNeita Kelly and I have been crafting for at least the last 20 years. I live in Forney, Texas with my son, Dallas. I am a High School teacher and Cheerleading Coach. I love to craft and to continue to improve my photography and editing skills whenever I have free time. What I love most is telling our story using pictures, it is the most important gift I can leave my family. 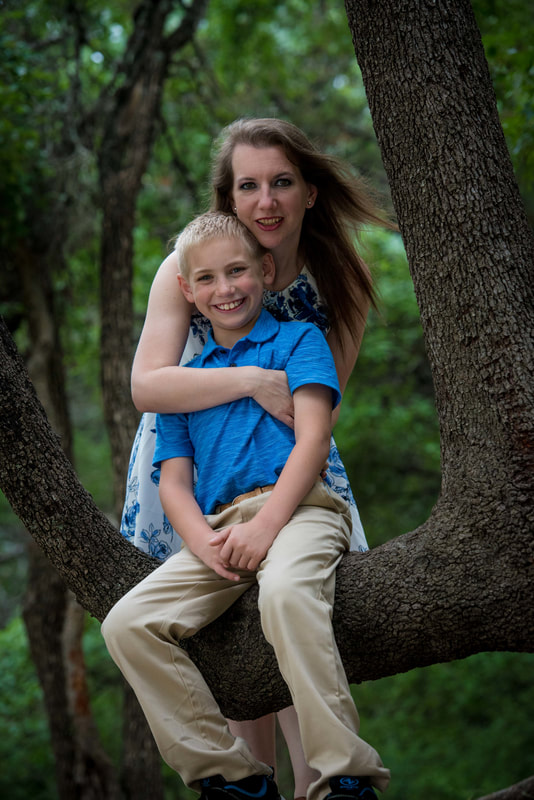
Photo by Steven Mackie Photography.
Categories
All
Archives
December 2021


Former Design Team Member for Fantabulous Cricut Challenge Blog
 |


 RSS Feed
