
It's the Simple Things
 This past year, I have had a lot of fun creating door wreaths for my front door. I have never lived in a neighborhood where I wanted to decorate my front porch like I do at our house in Cedar Park. This style of wreath is one of the easiest I have ever made; anyone can do it.
Materials Used: 4 large rolls of ribbon (Black sparkle) Embellishments, these are from Michaels (Boo, spiders, orange glitter sticks, pumpkin) 12 in Embroidery hoop To make this:
1 Comment
 When Dallas and I moved to Cedar Park, we were lucky enough to move into a neighborhood that we love. We were also lucky enough to meet a really great family that lives a couple of houses down. Their oldest son and my son became fast friends, and I am so grateful to say that I found a great friend in Lindsey. She even allows me to play with their little girl, Emme, who is the sweetest little girl ever. In the past couple of weeks, she has started to say "Hi Jo" when I walk in to the room, and my heart melts. So, when Lindsey asked if I would take some pictures of Emme, I jumped on the chance to try and catch some of her personality and sparkle in her two year old pictures. I think they turned out really well and I am really happy at how great they are. It's easy to take pictures of someone so beautiful and cheerful. Enjoy!
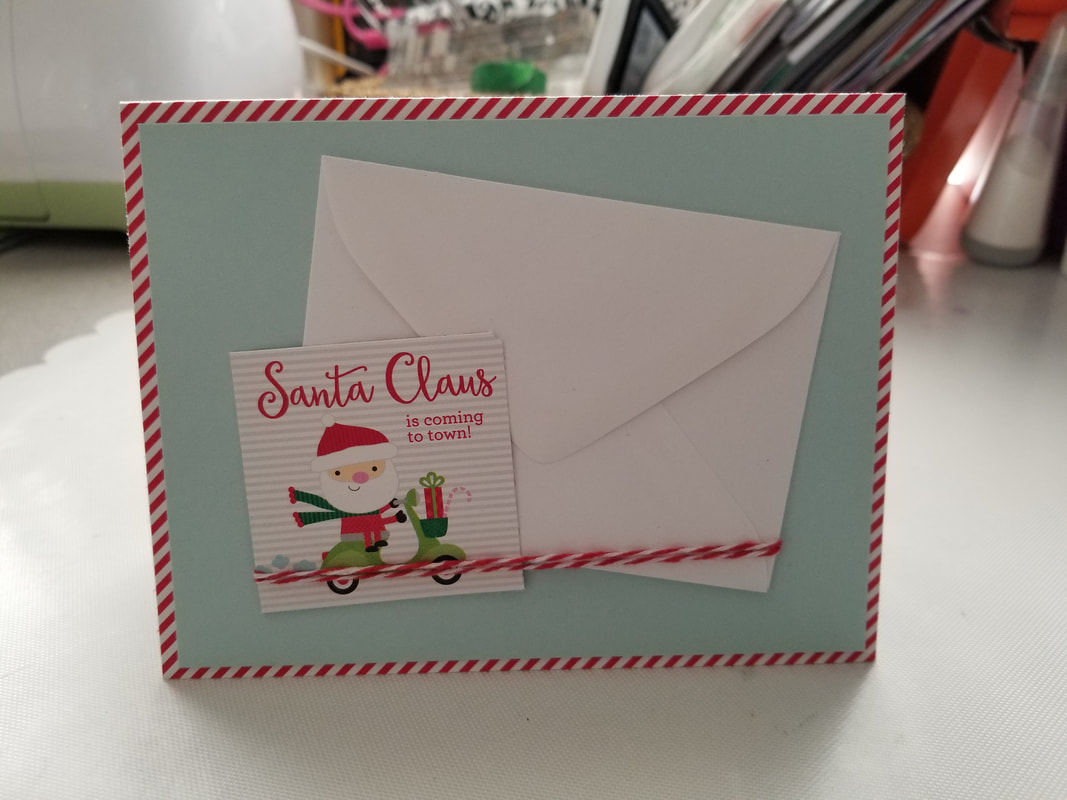
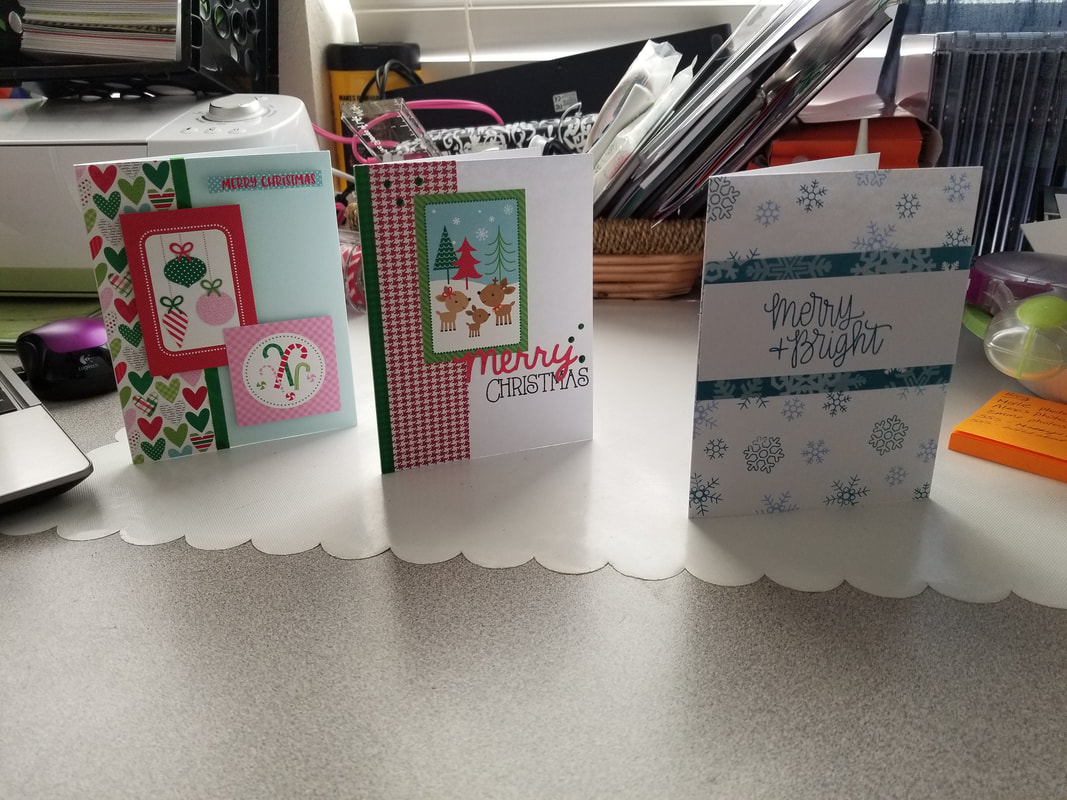
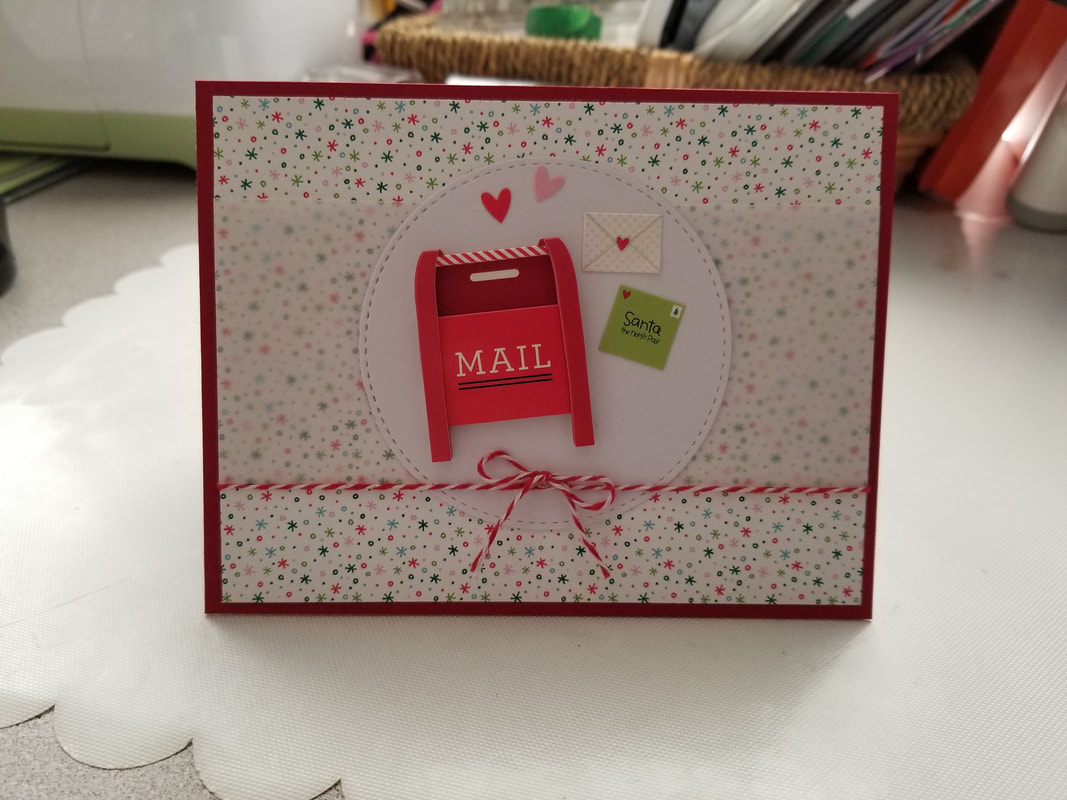
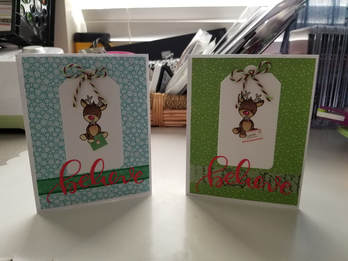
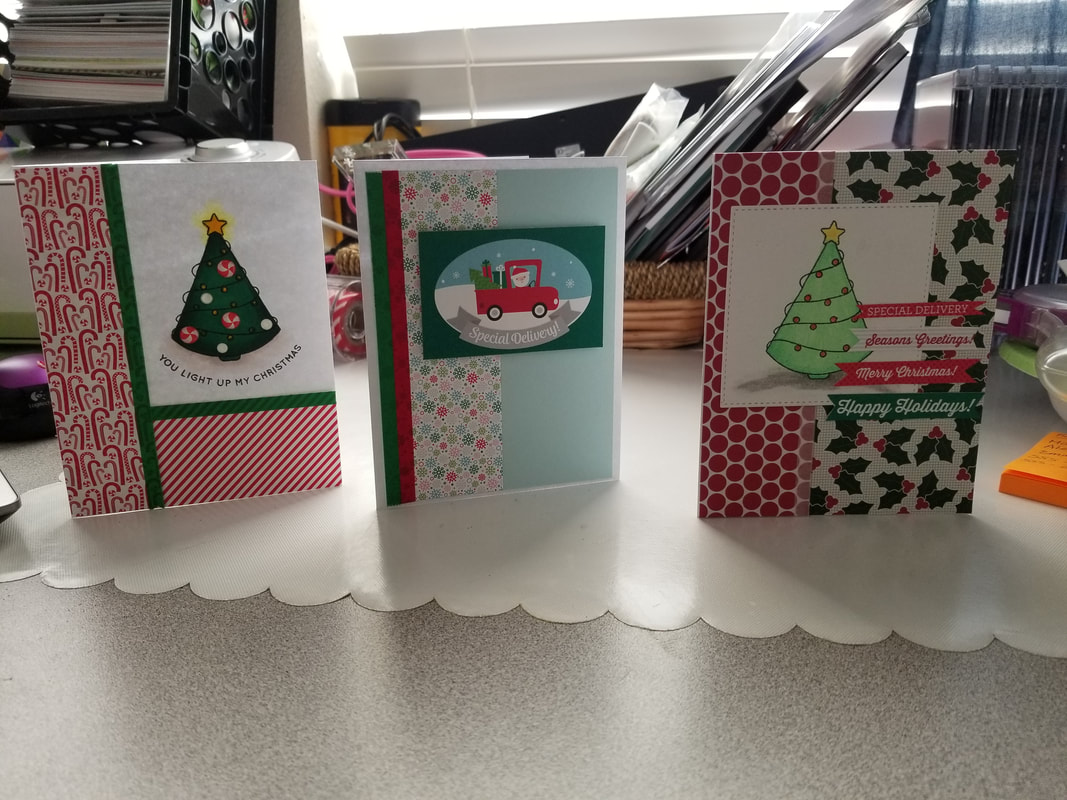
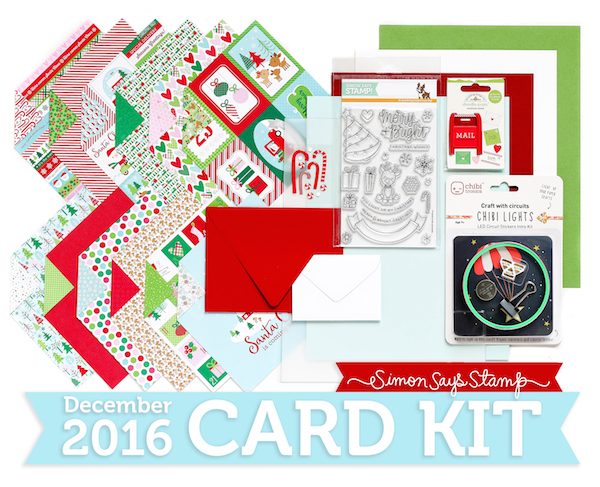
It's that time of the year, no not Halloween. It's time to start making my Christmas Cards. I have a huge family and it takes me a while to make enough to be able to give one to each part of my family and still have enough left over to give out to friends as well. On average, I make 60 Christmas cards each year, so I typically start in September or October to give myself time to get them all finished. This year, I was having trouble finding inspiration and didn't like any of the 1st cards that I made, then I remembered that I had the Simon Says Stamp Merry and Bright (December 2016 release) card kit, which I received last year after I had finished making all my cards. This was a great opportunity to use it, so I got it out and immediately got to work. I love that Simon includes a page of examples and inspiration. I was drawn to 2 of the cards right away and decided to scraplift them. Once I made a few cards, I couldn't stop. I made 13 cards from this kit, and still have material leftover to make more.
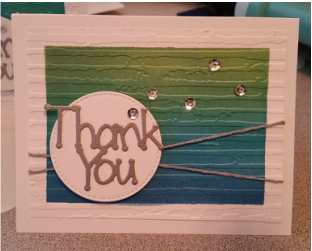
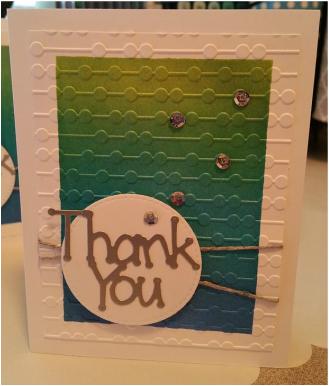
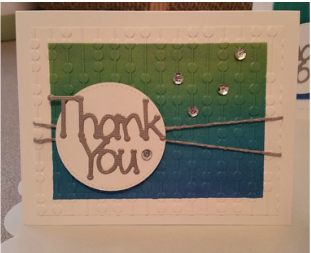
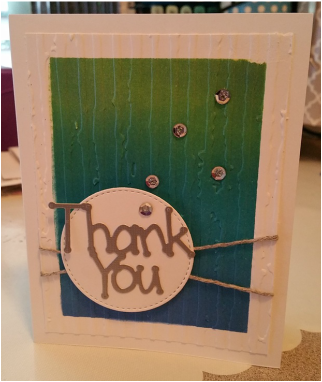
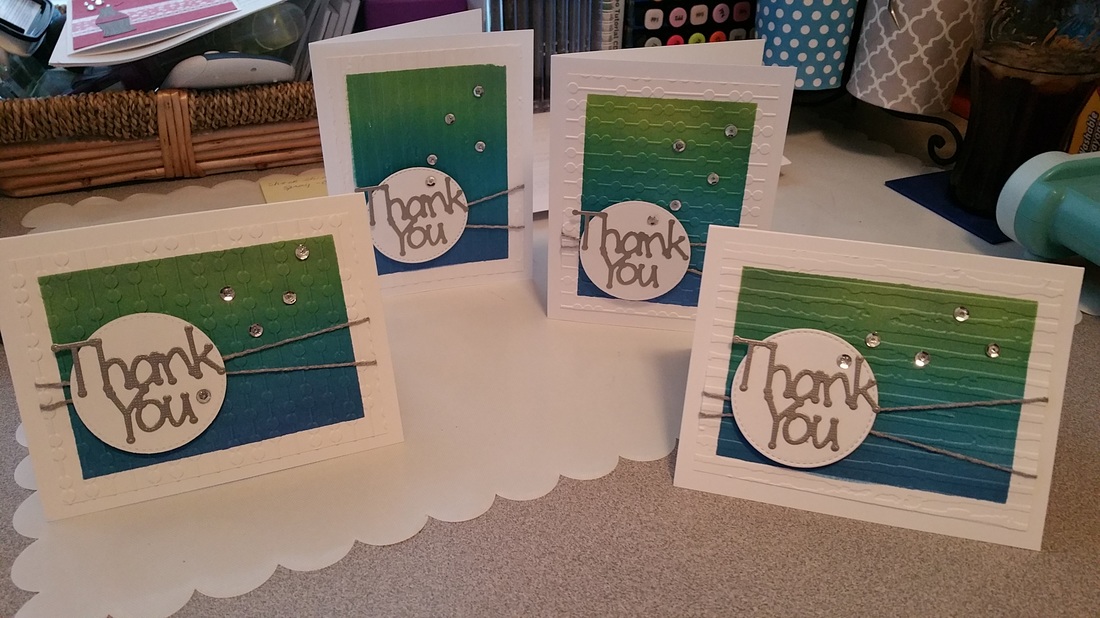 I am always looking for new ways to use the products that I already own, so I watch a lot of videos and visit a lot of blogs to soak in as many new techniques and new ideas as possible. Every once in a while, I come across something that just wows me, and this technique did. I love it!!! As soon as I was finished watching the video, I pulled out my supplies and made these Thank You cards. My mind is full of other ways to use this technique and the supplies, that I already have, that I can use to make them. I believe in giving credit to those I learn from. I found this video: Faux Textured Metal Paper on the Jennifer McGuire Ink blog (the link will take you to this specific video). She has some great stuff, so check it out. The general steps to make these cards are:
Materials Used:
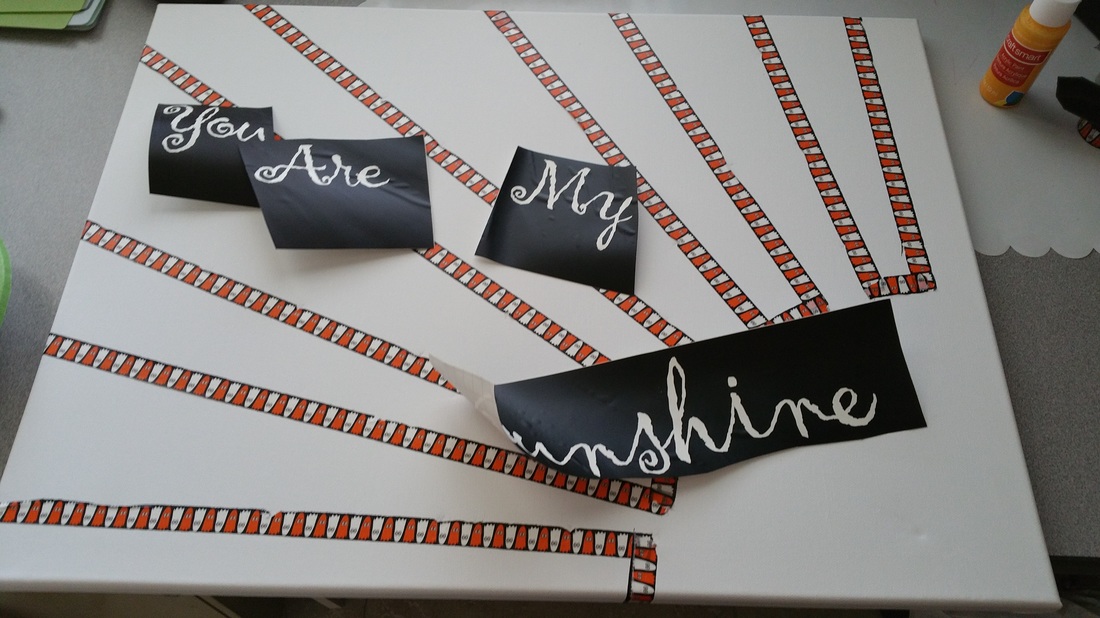
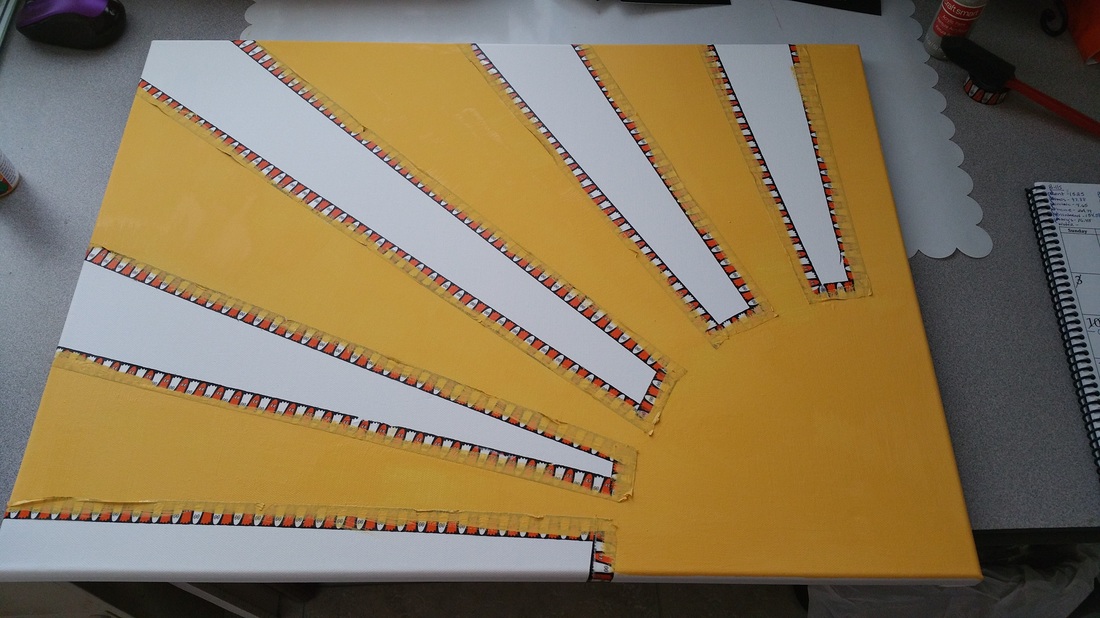
Ink: Tim Holtz Distress Inks in Twisted Citron, Mermaid Lagoon, and Blueprint Sketch Perfect Pearls: Forever Blue Stamps of Life: "Thank You" die, silver twine, silver sequins My Favorite Things: Stitched Stackable Circles Cardstock: Recollections Challenges Entered: Pause Dream Enjoy Glitter 'N' Sparkle Cupcake Inspirations Come and Get It Lil' Patch of Crafty Friends Pile it On Crafting by Designs If You Give a Crafter a Cookie Simon Says 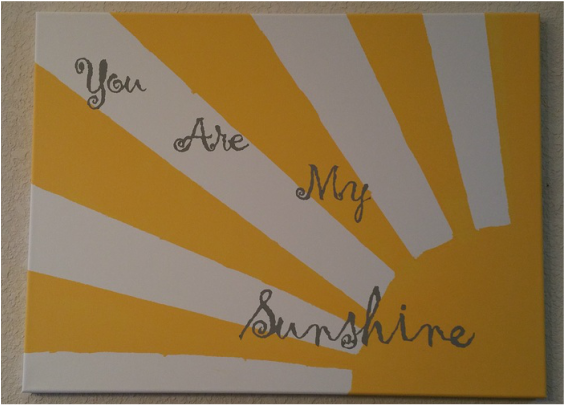 I have had a lot of fun decorating my new house. My kitchen/dinning room is done in Grey, Yellow, and White. I love the color combination, and already had a lot of items to hang on the walls. In my new house, I found that I have more wall space than I had in my old house, so I decided to make some new things to add more color. I found some big canvas' on sale at Hobby Lobby, then cut out the words "You Are My Sunshine" using my cricut and some vinyl. Next, I taped off the sun and rays using some washi tape and painted them yellow. Then I used the negative space as stencils to paint the words grey. Once it all dried, I removed all the tape/washi tape...then it was put up on my wall. I really love how it turned out and am looking forward to making more.
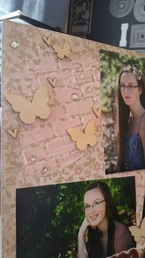
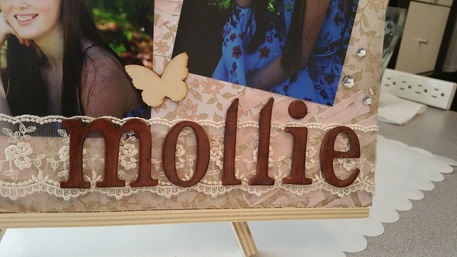
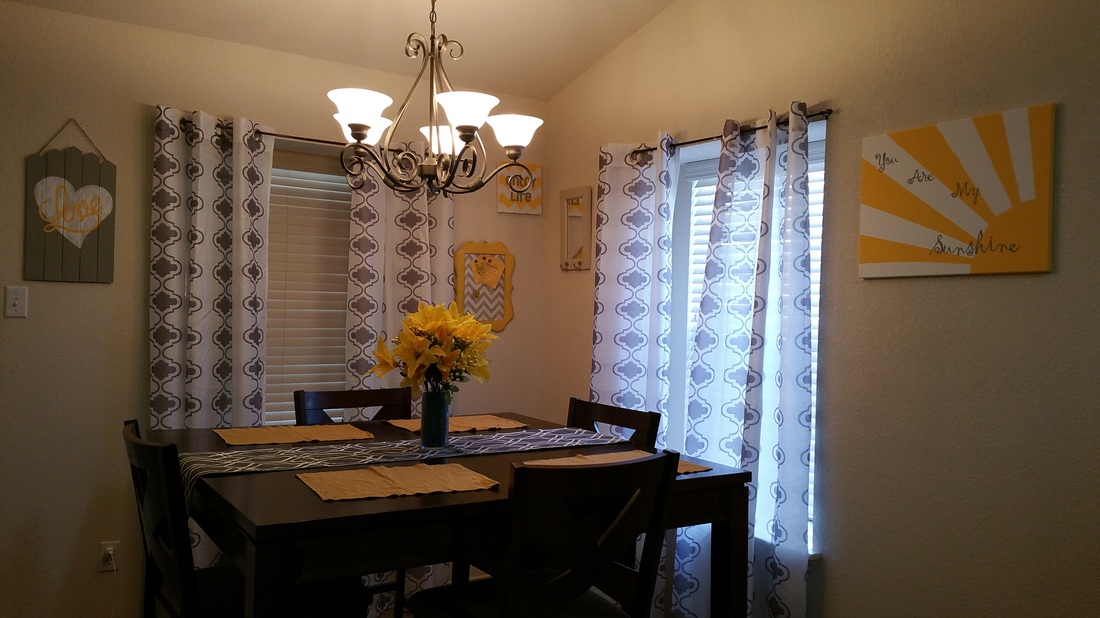 My dining room, where I made most of the decorations. 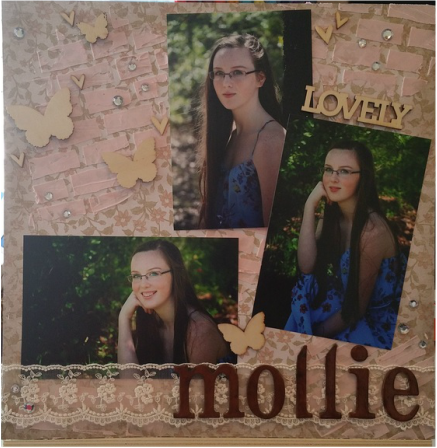 So, my son and I have made our move to Cedar Park, and have been in our new home for a couple of weeks now. I was really nervous about moving so far away from my family, but I have grown to be very comfortable in our house in a very short time. My son has already found a new "best friend," they have been become fast friends. I have been working on getting all of our things unpacked and making our house feel like a home. The last room that I was able to unpack was my craft room, but once I got it all set up, I started to craft. It felt like it had been years since I was able to create something new. I started with a scrapbook page of some pictures I took of my cousin Mollie. She is such a pretty and smart girl...very natural, so I wanted the page to have a natural look as well. This was the first time that I used texture paste, and I have to say...I am in love. I was able to use my distress inks to give the paste a light pink color, which fit in with the flowers on the pattern paper and the flowers on her dress. I also had some cream color ribbon that I knew I wanted to use, along with some wood shapes. I really love how the page turned out. Check out the pictures from this quick and fun photo shoot below. Mollie is so easy to photograph.

|
 

JoNeita & Dallas - Dec. 2021
About MeMy name is JoNeita Kelly and I have been crafting for at least the last 20 years. I live in Forney, Texas with my son, Dallas. I am a High School teacher and Cheerleading Coach. I love to craft and to continue to improve my photography and editing skills whenever I have free time. What I love most is telling our story using pictures, it is the most important gift I can leave my family. 
Photo by Steven Mackie Photography.
Categories
All
Archives
December 2021


Former Design Team Member for Fantabulous Cricut Challenge Blog
 |


 RSS Feed
